Interactsh
Fix lỗi không thể chạy interactsh-server với quyền root:
sudo chmod +x $(which interactsh-server)  # Make it executable
sudo chown root:root $(which interactsh-server)  # Change ownership
sudo mv $(which interactsh-server) /usr/local/bin/  # Move to a system path
Script để chạy interactsh-server:
#/bin/zsh

# Define log directory
LOG_DIR="/home/insomnia/logs/interactsh"

# Create log directory if it doesn't exist
mkdir -p "$LOG_DIR"

# Find the latest log file (sorted by modification time)
LATEST_LOG=$(ls -t "$LOG_DIR"/*.log 2>/dev/null | head -n 1)

# Check if the latest log exists and is less than 1MB (1048576 bytes)
if [ -f "$LATEST_LOG" ] && [ "$(stat -c%s "$LATEST_LOG")" -lt 1048576 ]; then
    LOGFILE="$LATEST_LOG"  # Use the existing log file
else
    LOGFILE="$LOG_DIR/$(date +%s).log"  # Create a new log file
fi

# Run the command with output redirected to the log file
sudo -b interactsh-server -domain insomnia1102.online -http-directory /home/insomnia/payloads >> "$LOGFILE" 2>&1

# Wait briefly for the process to start
sleep 1

# Get the actual PID of interactsh-server
PGREP_PID=$(pgrep -f "interactsh-server -domain insomnia1102.online")

# Save the PID to a file
echo "$PGREP_PID" > /tmp/interactsh-server.pid

# Print the PID for confirmation
echo "interactsh-server started with PID: $PGREP_PID"
Log sẽ được lưu trong thư mục ~/logs.
Script để tắt interactsh-server:
#!/bin/bash
if [[ -f /tmp/interactsh-server.pid ]]; then
    sudo kill $(cat /tmp/interactsh-server.pid)
    sudo rm -f /tmp/interactsh-server.pid
fi
Ta dùng app.interactsh.com để làm client nhằm tạo subdomain payload và xem các request gửi đến. Tuy nhiên, ta cũng có thể chạy client ở dưới local bằng cách sử dụng projectdiscovery/interactsh.
Install:
go install -v github.com/projectdiscovery/interactsh/cmd/interactsh-client@latestChạy như sau:
interactsh-client -auth=<PDCP_API_KEY> -server insomnia1102.online -vVới -server là để chạy với server đã cấu hình còn -v là để hiển thị nội dung của các request gửi đến.
Cũng có thể kết hợp với Notify để gửi thông báo về discord:
interactsh-client -auth=<PDCP_API_KEY -server insomnia1102.online -v | notify -bulk -id interactsh-clientConfig:
discord:
  - id: "data"
    discord_channel: "crawl"
    discord_username: "insomnia"
    discord_format: "{{data}}"
    discord_webhook_url: "https://discord.com/api/webhooks/1365550444583325808/YyKpF_flavCur5bmV_c8GoNhulWQxNLOgYXTd0cYZWT1V5SBat-v4a2ANsRYdh9QmV1n"

  - id: "interactsh-client"
    discord_channel: "subs"
    discord_username: "insomnia"
    discord_format: "{{data}}"
    discord_webhook_url: "https://discord.com/api/webhooks/1365580912942780446/jlaj_33WGtYUkB9X4R4J1IOXwLIN96KvK3SPVczD_z7mwLs8dT7-wvsWcXIVGqhk0HDw"
Note
Không sử dụng crontab nữa mà dùng
tmuxđể chạy các scriptinteractsh-servervàinteractsh-client. Các script này đã được sửa lại để duy trì sự hoạt động. Câu lệnh chạy script:tmux new-session -s interactsh-server 'sudo ./interactsh.sh' tmux new-session -s interactsh-client './interactsh-client.sh'Sau khi chạy session thì nhấn CTRL B + D để đưa
tmuxsession về background.Để chạy lại
interactsh.sh, cần phải xóa file/tmp/interactsh.lock` (đây là file đảm bảo chỉ có một instance của script được chạy).
Pyenv Problem
Khi cài đặt Python với pyenv, nó có thể sử dụng rất nhiều CPU để build và VPS thì lại giới hạn tài nguyên này.
Seealso
Xem thêm: Issue
Do đó, có thể dùng một giải pháp khác để quản lý các phiên bản của Python chẳng hạn như Poetry - Python dependency management and packaging made easy.
Change Detection
Cấu hình thông báo cho changedetection.io: Notify_discord · caronc/apprise Wiki
Cách update: How to properly update changedetection · dgtlmoon/changedetection.io · Discussion #1552
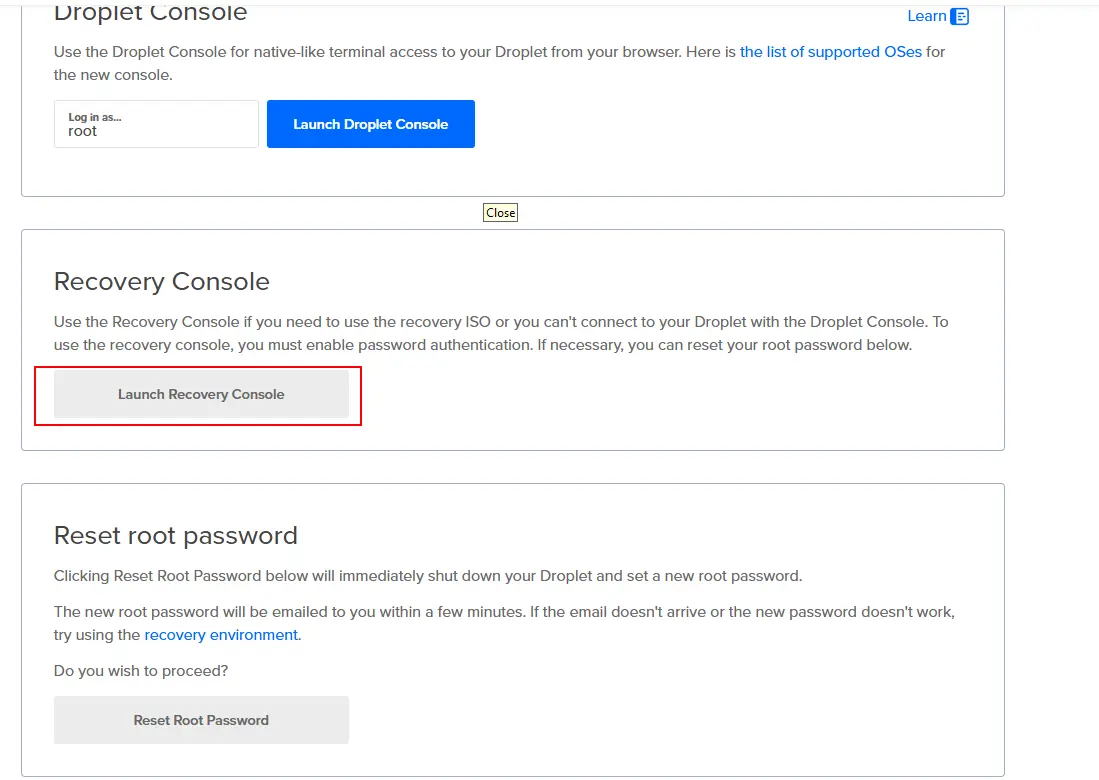
Recovery Console
Nếu có lỡ bật tường lửa và quên allow port 22 dùng cho kết nối SSH thì sử dụng Recovery Console để allow:
Ax Framework
Jsluice
Thêm vào custom one-shot module dùng cho jsluice bằng file ~/.axiom/modules/jsluice-urls.json như sau:
[
  {
    "command": "jsluice urls _target_ -I -S | tee output/_cleantarget_",
    "threads": "1",
    "ext": "jsonl"
  }
]
Câu lệnh cài đặt:
go install github.com/BishopFox/jsluice/cmd/jsluice@latestLý do mà ta cần dùng one-shot module là vì jsluice chỉ nhận vào 1 target một lần chứ không nhận vào cả list.
Chạy module như sau:
ax scan katana.txt -m jsluice-urls -o jsluice-urls.jsonlSecretFinder
One-shot module cho SecretFinder.py:
[
  {
    "command": "python3 /home/op/secretfinder/SecretFinder.py -i _target_ -o cli | tee output/_cleantarget_",
    "threads": "2",
    "ext": "txt"
  }
]
Trufflehog
Tạo module để scan với trufflehog filesystem:
[
  {
    "command": "cat input | while read url; do curl -s $url -o temp.js && trufflehog filesystem temp.js --no-update && rm temp.js; done | tee output",
    "ext": "txt"
  }
]
Note
Cần phải cài đặt
trufflehog:ax exec 'sudo curl -sSfL https://raw.githubusercontent.com/trufflesecurity/trufflehog/main/scripts/install.sh | sudo sh -s -- -b /usr/local/bin'
Custom Wordlist Generator
Bởi vì VPS có tài nguyên giới hạn nên không thể build ruby từ source để chạy CeWL. Do đó, chúng ta cần sử dụng docker như sau:
docker run -it --rm ghcr.io/digininja/cewl URLXây dựng module cho cewl (tham khảo từ module linkfinder):
[
  {
    "command": "docker run --rm -i ghcr.io/digininja/cewl _target_ | tee output/_cleantarget_",
    "threads": "2",
    "ext": "txt"
  }
]
subzy
Module cho subzy:
[
  {
    "command": "subzy run --targets input | tee output",
    "ext": "txt"
  }
]
Câu lệnh cài đặt:
go install -v github.com/PentestPad/subzy@latestdnsReaper
Module cho dnsreaper:
[
  {
    "command": "docker run -it --rm --mount type=bind,source=\"$(pwd)\",target=/data punksecurity/dnsreaper file --filename /data/input --out /data/output -v",
    "ext": "txt"
  }
]
Nuclei with AI Templates
Module cho nuclei với AI templates:
[
  {
    "command": "/home/op/go/bin/nuclei -update -silent ; cat input | PDCP_API_KEY=<API_KEY> /home/op/go/bin/nuclei  -o output",
    "ext": "txt"
  }
]
Chạy như sau:
ax scan domains.txt -m nuclei-ai -o nuclei-ai.txt --extra-args '-ai "Scan for access control vulnerabilities that allow unauthorized access."'Với prompt "Scan for access control vulnerabilities that allow unauthorized access." lấy từ Nucleiprompts.com | Nuclei AI Prompts.
WPProbe
Cài đặt wpprobe:
ax exec 'go install github.com/Chocapikk/wpprobe@latest'Module cho wpprobe:
[
  {
    "command": "wpprobe update ; wpprobe update-db ; wpprobe scan -f input -t 20 -o out.json; mv out.json output",
    "ext": "json"
  }
]
Note
Do không có extension là
json(chỉ cójsonl) nên ta dùngtxtđể thay thế.
Câu lệnh sử dụng:
ax scan urls.txt -m wpprobe -o wpprobe.jsondnsx
Chỉnh sửa config của module lại như sau để nó thực hiện tất cả các loại DNS query và hiển thị DNS response:
[
  {
    "command": "cat input | /home/op/go/bin/dnsx -r /home/op/lists/resolvers.txt -o output -recon -resp",
    "ext": "txt"
  }
]
Vhost Enumeration
Các subdomain khác nhau có thể cùng nằm trên một server có cùng IP. Để phân biệt các subdomain, sẽ có một reverse proxy chẳng hạn như Nginx dùng để phân phối các request. Ví dụ, đoạn cấu hình sau của Nginx giúp phân phối các request đến các backend server khác nhau:
# Nginx reverse-proxy configuration
server {
    server_name app.example.com api.example.com;
    location / {
        proxy_pass http://localhost:8080;
        proxy_set_header Host $host;
    }

    # ...
}

server {
    server_name app-stg.example.com api-stg.example.com;
    location / {
        proxy_pass http://localhost:8081;
        proxy_set_header Host $host;
    }

    # ...
}
Ta gọi các subdomain khác nhau mà có cùng IP là các vhost.
Ta sẽ sử dụng ffuf để thực hiện vhost enum cho một target nào đó (không phải một list).
Seealso
Đây có thể được xem như là một cách để thực hiện subdomain enumeration.
ffuf With POST Method
Đôi khi các endpoint chỉ có duy nhất một method là POST chẳng hạn như trong đoạn code bên dưới.
import express, { Request } from 'express';

const app = express();
const port = 8080;

...

app.post('/api/render-report', async (req: Request, res: any) => {
  const { data } = req.body;

  const res: string = await renderReport(data);

  res.send(res);
});

app.listen(port, () => {
  console.log(`Server is running at port ${port}`);
});
Nếu ta chỉ fuzz bằng method là GET thì có thể bị miss. Để tránh trường hợp này, ta nên fuzz thêm bằng method POST sử dụng ffuf như sau:
ax scan domains-nowaf.txt -m ffuf -o ffuf.txt --extra-args '-X METHOD -w /home/op/lists/methods.txt:METHOD -fc 400,404,405 -r -v'Với /home/op/lists/methods.txt là wordlist tự tạo gồm hai giá trị là GET và POST.
dirsearch
[
  {
    "command": "dirsearch -l input -w /home/op/lists/seclists/Discovery/Web-Content/dsstorewordlist.txt,/home/op/lists/seclists/Discovery/Web-Content/quickhits.txt,/home/op/lists/seclists/Discovery/Web-Content/big.txt -o output",
    "ext": "txt"
  }
]
waymore
Sử dụng config file để cấu hình. Cấu hình mẫu:
FILTER_CODE: 404,301,302
FILTER_MIME: text/css,image/jpeg,image/jpg,image/png,image/svg+xml,image/gif,image/tiff,image/webp,image/bmp,image/vnd,image/x-icon,image/vnd.microsoft.icon,font/ttf,font/woff,font/woff2,font/x-woff2,font/x-woff,font/otf,audio/mpeg,audio/wav,audio/webm,audio/aac,audio/ogg,audio/wav,audio/webm,video/mp4,video/mpeg,video/webm,video/ogg,video/mp2t,video/webm,video/x-msvideo,video/x-flv,application/font-woff,application/font-woff2,application/x-font-woff,application/x-font-woff2,application/vnd.ms-fontobject,application/font-sfnt,application/vnd.android.package-archive,binary/octet-stream,application/octet-stream,application/pdf,application/x-font-ttf,application/x-font-otf,video/webm,video/3gpp,application/font-ttf,audio/mp3,audio/x-wav,image/pjpeg,audio/basic,application/font-otf,application/x-ms-application,application/x-msdownload,video/x-ms-wmv,image/x-png,video/quicktime,image/x-ms-bmp,font/opentype,application/x-font-opentype,application/x-woff,audio/aiff
FILTER_URL: .css,.jpg,.jpeg,.png,.svg,.img,.gif,.mp4,.flv,.ogv,.webm,.webp,.mov,.mp3,.m4a,.m4p,.scss,.tif,.tiff,.ttf,.otf,.woff,.woff2,.bmp,.ico,.eot,.htc,.rtf,.swf,.image,/image,/img,/css,/wp-json,/wp-content,/wp-includes,/theme,/audio,/captcha,/font,node_modules,/jquery,/bootstrap
FILTER_KEYWORDS: admin,login,logon,signin,signup,register,registration,dash,portal,ftp,panel,.js,api,robots.txt,graph,gql,config,backup,debug,db,database,git,cgi-bin,swagger,zip,.rar,tar.gz,internal,jira,jenkins,confluence,atlassian,okta,corp,upload,delete,email,sql,create,edit,test,temp,cache,wsdl,log,payment,setting,mail,file,redirect,chat,billing,doc,trace,ftp,gateway,import,proxy,dev,stage,stg,uat,sonar.ci.,.cp.
URLSCAN_API_KEY:01969f62-fc53-714f-8e29-5ee3326c3c8f
VIRUSTOTAL_API_KEY:
CONTINUE_RESPONSES_IF_PIPED: True
WEBHOOK_DISCORD: https://discord.com/api/webhooks/1368853339130826752/X4DEs_NnrcESHVhzkaUqIFhhnYWMLOSzxsw_Q_pngWrpnKWHKuCSi83Ezubo-pL7-snu
DEFAULT_OUTPUT_DIR:
INTELX_API_KEY:
zdns
Tool này chỉ có thể được cài đặt thông qua source:
make installĐể có thể resolve nhiều loại record thì cần dùng câu lệnh sau:
cat 1000k_domains.txt | zdns MULTIPLE --multi-config-file="./multiple.ini"Với multiple.ini có thể được tìm thấy trong thư mục src/cli/multiple.ini của source code. Cấu hình như sau:
; Specify Global Options here
[Application Options]
iterative=true
prefer-ipv6-iteration="true"
; List out modules and their respective module-specific options here. A module can only be listed once
[ALOOKUP]
ipv4-lookup = true
; You can use default values and just list modules if you don't need to specify any options
[A]
[AAAA]
[CNAME]
[PTR]
Tham khảo: zmap/zdns: Fast DNS Lookup Library and CLI Tool.
Run via Docker
docker exec -it $(docker run -d -it --name ax -v /home/insomnia/ax:/root --add-host=host.docker.internal:host-gateway --platform linux/amd64 ubuntu:20.04) sh -c "apt update && apt install git -y && git clone https://github.com/attacksurge/ax/ ~/.axiom/ && cd && .axiom/interact/axiom-configure --run"Notify
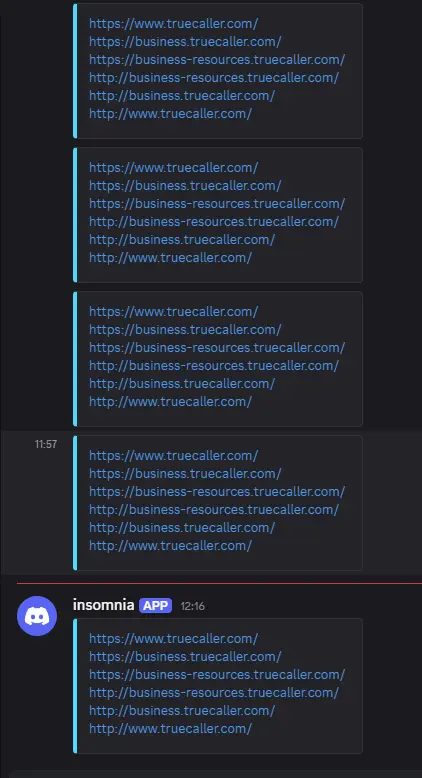
Chúng ta có thể gửi data đến webhook sử dụng projectdiscovery/notify: Notify is a Go-based assistance package that enables you to stream the output of several tools (or read from a file) and publish it to a variety of supported platforms.. Ví dụ:
notify -data urls.txt -bulk -provider discordData nhận được ở bên discord:
Kill Running Process Properly
Để kết thúc một process của ax khi nó đang chạy, ta cần thực hiện các bước sau:
- Ghi nhớ PID của tiến trình
zshcha. - Gửi
kill -SIGTERMvào tiến trình/bin/bash /root/.axiom/interact/ax scan - Gửi
kill -SIGINTvào tiến trình/bin/bash /root/.axiom/interact/ax scan - Gửi
kill -KILLvào tiến trìnhzshcha.
Ta có thể làm tất cả các bước này thông qua htop.
Using tmux
Để có thể đưa tiến trình scan vào background, ta nên sử dụng Tmux:
tmux new-session -s oppo-dnsx "ax scan subdomains.txt -m dnsx -o dnsx.txt"Kill session nếu muốn kết thúc:
tmux kill-session -t oppo-dnsxLiệt kê các session:
tmux lsAttach lại vào session:
tmux attach -t oppo-dnsxChange Region of Azure VPS
Các bước cơ bản:
- Chụp ảnh đĩa (Snapshot): Chụp ảnh đĩa hệ điều hành (OS Disk) và các đĩa dữ liệu (Data Disks) của VM nguồn.
- Tạo Managed Disk từ Snapshot: Ở region đích, tạo Managed Disk từ các Snapshot đã chụp.
- Tạo VM mới: Tạo một VM mới ở region đích, sử dụng các Managed Disk vừa tạo làm OS Disk và đĩa dữ liệu.
- Cấu hình lại: Bạn sẽ cần cấu hình lại mạng ảo (VNet), nhóm bảo mật mạng (NSG), địa chỉ IP công cộng (Public IP) và bất kỳ cấu hình ứng dụng nào khác trên VM mới.
- Gỡ bỏ VM cũ: Sau khi xác nhận VM mới hoạt động, bạn có thể xóa VM cũ và các tài nguyên liên quan ở region nguồn.
Seealso